The first key to
responsible off-roading is having the proper equipment. Anytime
you go off the pavement, make sure you can answer these key
questions: Can I extract myself if my vehicle gets stuck? If
I somehow cannot get unstuck on my own, am I prepared to spend an
extended time at that location? Am I able to make any necessary
repairs to the vehicle? If the weather turns sour, am I able to
stay warm, dry, and nourished? How will I locate aid? If I
am injured, can I treat myself? Do I have the means to call for
assistance?
The
equipment I carry has been categorized into three groups:
- Recovery
& Repairs
- Navigation
& Communication
- Camping
& Survival
|
|
Recovery
& Repairs
As
far as your vehicle is concerned, the most important equipment is
recovery and repair equipment. This will allow you to get you and your
vehicle unstuck, fixed, and hopefully out of potentially dangerous situations. I
purchased almost all of my recovery equipment from expedition
exchange. They are a great company to work with, and I would recommend
them to anyone.
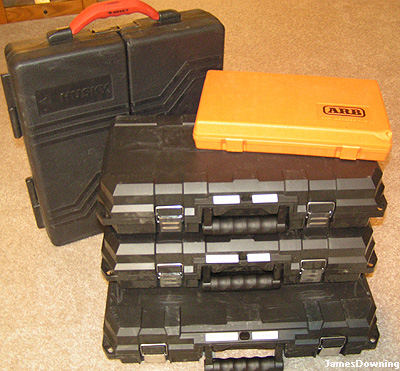
The most basic piece of
recovery is the recovery (or snatch) strap. I keep this in my
strap case along with a few other items.
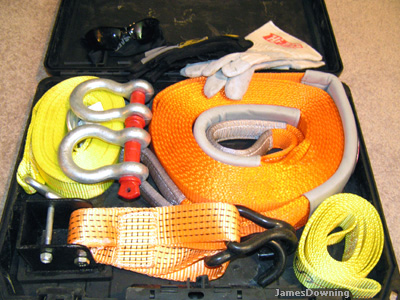
It's important not to skimp
on a good recovery strap, that's why I went with the best in the
business, ARB. They have a range of straps that are rated for all
sizes of truck.
Another component of strap
case is the versatile Lift Mate. This fits right over the tongue
of the Hi-Lift and allows you to use it on vehicles without solid
lift-points, such as the TrailBlazer. With the sheet-metal wheel
wells, and the plastic bumpers, you would surely damage something if you
tried to lift the truck without the proper attachment. The Lift
Mate has two plastic covered hooks that can be used to lift at the
wheel, or give you other options for lifting.
 The
case also holds a tree strap, a few shackles, gloves, and a static rigging
strap (marked on all ends with an S). On a TrailBlazer, a static
strap is important for front pulls, as the stock tow-hooks are not necessarily
strong enough for a full-out pull. Luckily, if you rig up a static
strap to both front hooks (shown on right), you can use the hooks for most any
application. The key is spreading the stress between the two
hooks, depending on how you rig it, the force on each hook can be
reduced by 50%.
The
case also holds a tree strap, a few shackles, gloves, and a static rigging
strap (marked on all ends with an S). On a TrailBlazer, a static
strap is important for front pulls, as the stock tow-hooks are not necessarily
strong enough for a full-out pull. Luckily, if you rig up a static
strap to both front hooks (shown on right), you can use the hooks for most any
application. The key is spreading the stress between the two
hooks, depending on how you rig it, the force on each hook can be
reduced by 50%.
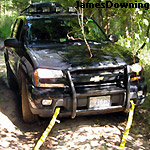
For rear pulls, I also
carry a receiver D-shackle. Remember to buy a good hitch
pin. A rear D-shackle is important for any situation where you are
recovering another vehicle. You never want to pull out another
vehicle when you are in reverse. That is a quick way to destroy
your drive train, as the gears are made to handle the power in one
direction (that's why it makes that whining sound in reverse).
The second key elements are
a decent shovel and a Hi-Lift jack:
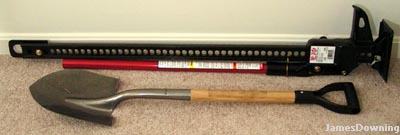
The shovel is fairly
basic. I chose a shorter one so it could fit in the trunk
easily. You want to make sure it has a large, wide scoop (not the
long skinny ones) and a right-angle handle on the end will help with
control of the shorter shovel. The shovel is key when you need to
add soil under a tire or remove soil from under the frame; every
situation is different.
The Hi-Lift is universally
known in all off-roading circles, and
serves many purposes. The first is to, of course, jack a vehicle
vertically off an obstacle. The second, and possibly more
important, is to winch a vehicle forward, or backwards. The jack
can also be used to clamp objects together. They come in several
varieties, including an X-treme version. There are only a few minor
differences between the jacks, such as length and a few components, and they are all
have a working load limit (WLL) of 4,660 lbs.
With some key add-ons, the
Hi-Lift can be the heart of your self-recovery toolbox.
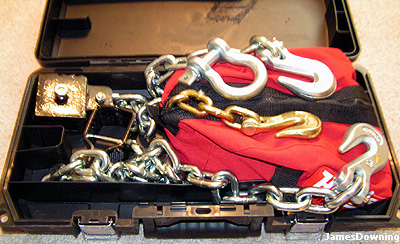
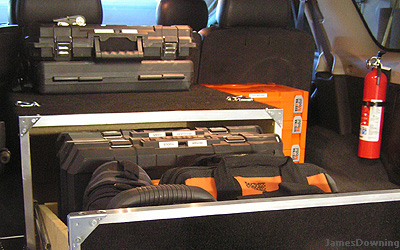
My chain case includes the Hi-Lift
winching accessories, and makes for quite a heavy case at about 50 lbs.
The heart of this bag is
Hi-Lift's Off Road Kit. The winch attachment and winch tensioner
are nice components that make winching with the Hi-Lift a whole lot
easier. These work in a ratcheting method along the 20' grade 70
5/16" chain (WLL of 5k lbs). Included in the Off Road Kit is an extra
D-shackle for attaching the eye of the hi-lift to a strap.
Pertinent to this section
but not included in this case is the off-road base for the
hi-lift. This plastic base improves hi-lift footing on unstable
surfaces such as mud and sand by spreading the weight over a larger
area.
For many off-roading trips,
it is important to deflate tires to a more pliable level. Its easy
to air down, however airing back up for the trip home requires an
additional piece of larger equipment.
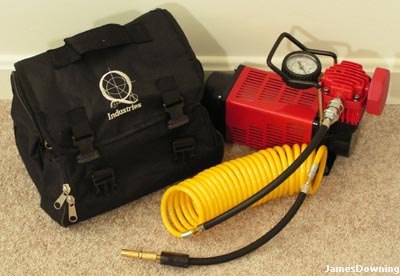
I chose a Q-Industries
portable compressor from 4-wheel
parts. The kit also comes with a nice carrying case and a
decently long coil hose. Most importantly, it was built
strong. For now, my compressor is staying
portable, but it could be hard-wired under the hood. It connects
to the battery terminals by some heavy duty clips. It can inflate
a tire from 15 psi to 30 in about 90 seconds (depending on the tire
volume).
For quick airing down, I
carry a set of Staun Tire Deflators. These little guys can save
you time at the trailhead by acting as automatic shutoff valves.
Pre-set for 18psi (and adjustable), the deflators do all the work of
stopping at the correct pressure for the tires. No more poking the
valve stem with a pencil.
 It is not only important to
have recovery items, but its also important to know the proper way to use
these items. Most importantly, get familiar with your equipment
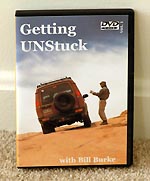
and use it in non-emergency situations for practice. I would also recommend
that anyone interested in off-roading purchase and watch Bill Burke's
'Getting Unstuck'. He does a much better job than I could at
explaining all the various recovery methods. His videos are available
from almost any off-road supplier, including expedition
exchange.
It is not only important to
have recovery items, but its also important to know the proper way to use
these items. Most importantly, get familiar with your equipment
and use it in non-emergency situations for practice. I would also recommend
that anyone interested in off-roading purchase and watch Bill Burke's
'Getting Unstuck'. He does a much better job than I could at
explaining all the various recovery methods. His videos are available
from almost any off-road supplier, including expedition
exchange.
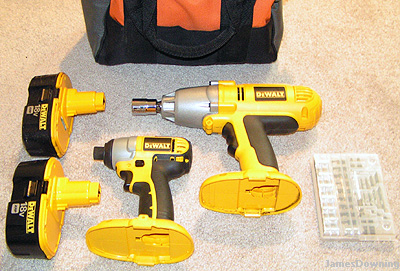
I carry a full set of
repair tools while on the trails: two cordless drills, batteries, and
drivers. (I recommend everyone get an impact wrench for
hot-swapping a blown tire. But keep the stock dog-leg wrench as a
backup.)
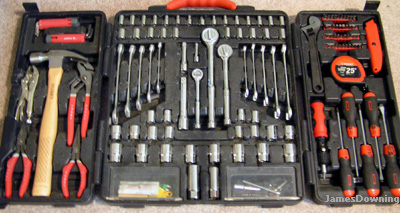
Hand tools include hammer, pliers,
wrenches, ratchets, allens, torx, drivers, etc.
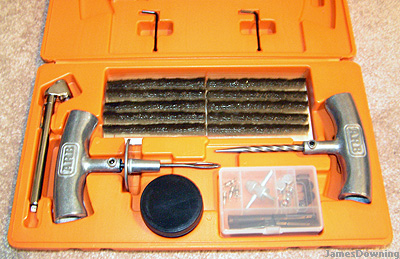
You don't want to find
yourself in a situation with two popped tires and only one spare, so I
included ARB's tire repair kit in my arsenal.
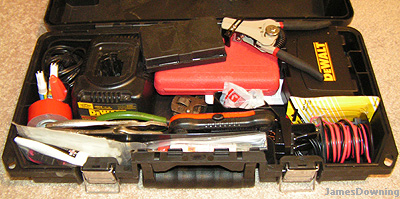
I carry another case full
of smaller specialty items. Wire, strippers, needle nose, vice
grips, super glue, JB weld, zip ties, battery charger, drill bits, spare
bulbs, spare electrical connectors, stripped nut removers, etc.
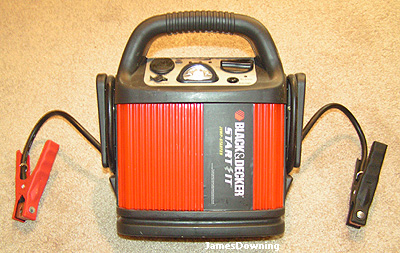
Lastly, don't leave home
without an emergency jump-starter kit. I carry a simple and cheap
unit from B&D. Not only will it start the vehicle if I
accidently leave a light on, it also provides mobile 12V power for
things such as the air-mattress inflator.
TOP
Navigation
& Communication
When
you are out in the woods it can be easy to get disoriented, especially
after making a couple turns on those back-woods roads. Its
important to always carry a good map of the area where you are
traveling.
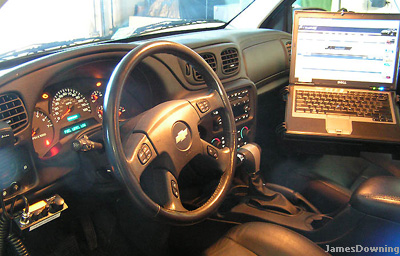
I keep three sources of
navigation with me when I off road. As a primary, I use Google
Earth with my own overlays of detailed maps. This is nice because
of the aerial photography, but its still has a few bugs. So I have
a Navigon 2100 Max for road navigation and a backup off
road navigator. As my last resort, I carry a good old Delorme
topographic map.
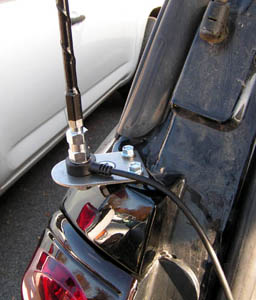
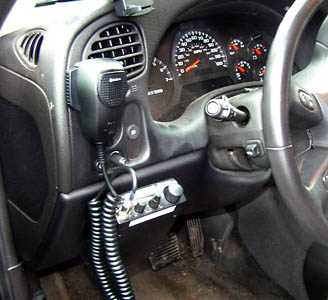
For communication, I've
installed a CB radio, shown above. Most all CB radios have the
same performance, as they are limited to a legal transmission power of 4
Watts. I chose a Cobra 19DX IV paired to a 3' Firestick. I
mounted the antenna to the rear quarter panel using a jeep hood mounting
bracket and sheet metal screws.
I also carry a simple set of
2-way radios for communication while hiking and as a backup. Cell phones will also generally work, but that is
not always a given. For this reason, I have thought about
purchasing a personal satellite beacon from Spot (more about that at a
future date).
TOP
Camping
& Survival
Camping
products are much less specialized, and can be easily found at your
local sporting goods store. The list of items can be amazingly
long, so I will just go over some of the basics.
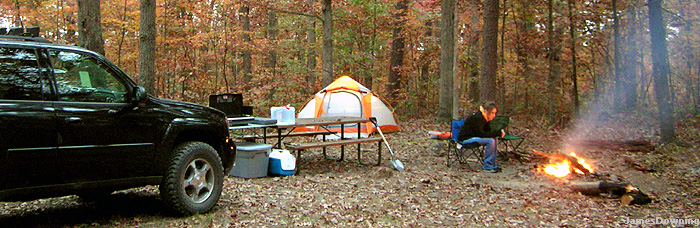
Shelter is one of the
essentials of camping. For basics, you need a dry shelter and a
place to rest your head (sleeping bag). As for the shelter, I
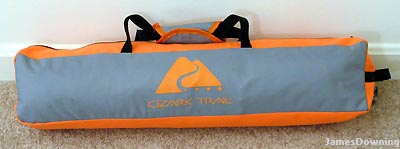
chose a small 3-person tent from Ozark Trail. Keep in mind that a
1 or 2 person tent is designed for minimal space. If you want to
fit two people in a tent, I would not recommend a 2 person tent; it will
be quite tight. A little bit of wiggle room is good, so I went
with a compact 3-person unit. The kit comes with a ground tarp and
rain cover included. The entire tent kit folds up into this 2'
case which helps with packing the trunk. The small size will also
be nice incase I need to hike out. I also chose one with a
high-visibility color. In the slim chance I do get stuck in the
wilderness, I want to be as visible as possible to the rescuers.
The second key is
food. Yes, emergency food packets are important, but not really
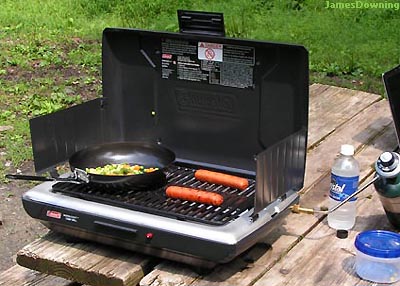
acceptable for 'gentleman's off roading'. I chose a Coleman grill
to serve as my camp stove. The grill is larger than a mini stove
burner, but the convenience is worth it. The grill itself also
packs well. It closes up into a durable briefcase sized package,
so I don't need to worry about packing it where it won't get
crushed. The fuel units are nice also, as they have a small size,
and are quite cheap at about $2 a unit.
For keeping food and drinks
cold, I currently use a small cooler. This works for short
outings, but even then the food can get a little warmer by the end of
the day. A plug-in 12V fridge is on 'the list'. Of
course, then I will need a second deep-cycle battery... and the mod cycle goes
on.
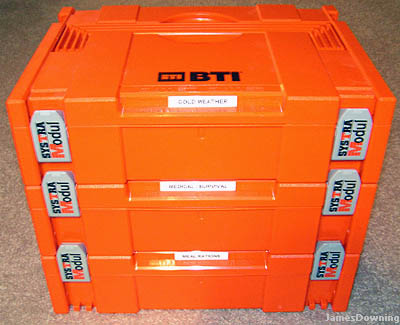
As far as survival goes, I carry
a few items in a compact interlocking container. I felt the bright
orange color denoted "emergency" fairly well.
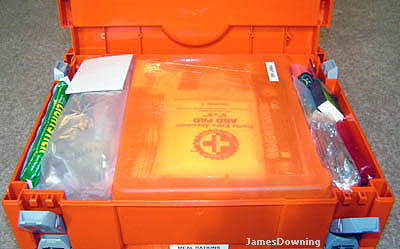
The
"medical/survival" box is full of... well just that. The bright orange box is a first aid kit from Ozark Trail.
Its fairly extensive, holding everything from bandaids to trauma pads to
light pain killers. Med kits
all basically hold the same things, just make sure you know what it contains.
Since I was an EMT, I also carry my own IV kit (to the left) which is only for extreme
circumstances where someone has lost a large amount of blood and
hypovolemia has set in. Not a bad idea if you know what you're
doing.
To the right is my mini survival kit.
Included in the kit are glow sticks,
thread, monofilament, space-blanket, first aid, mini
fire-starters, waterproof matches, and tons more. Also, unless you love bug
bites, don't forget some bug spray. You'll forget that once, and never
forget again.
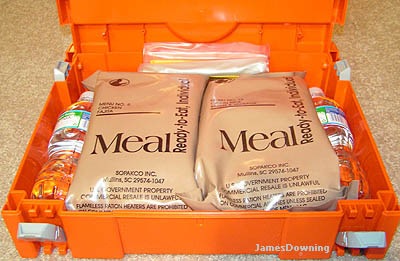
For an extreme emergency, I
carry two ready to eat meals (compliments to the special
services). The military version of these meals is idea because
they include a heating element within the MRE packet.
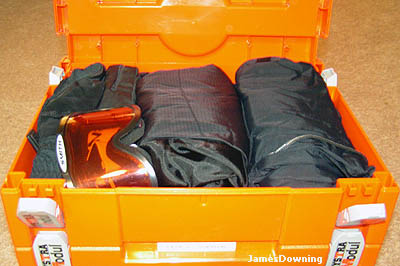
When traveling in the
winter, I carry a "cold weather" case. This houses
gloves, a rolled up jacket, rolled snow pants, goggles, and a balaclava.
TOP